Showing posts with label PSP Games. Show all posts

Sunday, November 18, 2007

EXIT Commercial


Still remember Exit? It's the PSP puzzle game where you take on the role of Mr. Escape and save various people inside what is supposed to be a burning building. Though I never did really see any sort of a "burning building" environment.

Now click Play and watch an absolutely unrelated commercial for this game:


From Silentwulf

Sunday, October 14, 2007

Making ISOs Smaller: Part Three

I've finally gotten down to finishing up the third part of Making ISOs Smaller. In the first part, I covered simple compression of ISO files, while in the second part I covered ripping of files out from the ISO. Today, I'll be covering the last technique I know, which is the ripping of files from munge files.

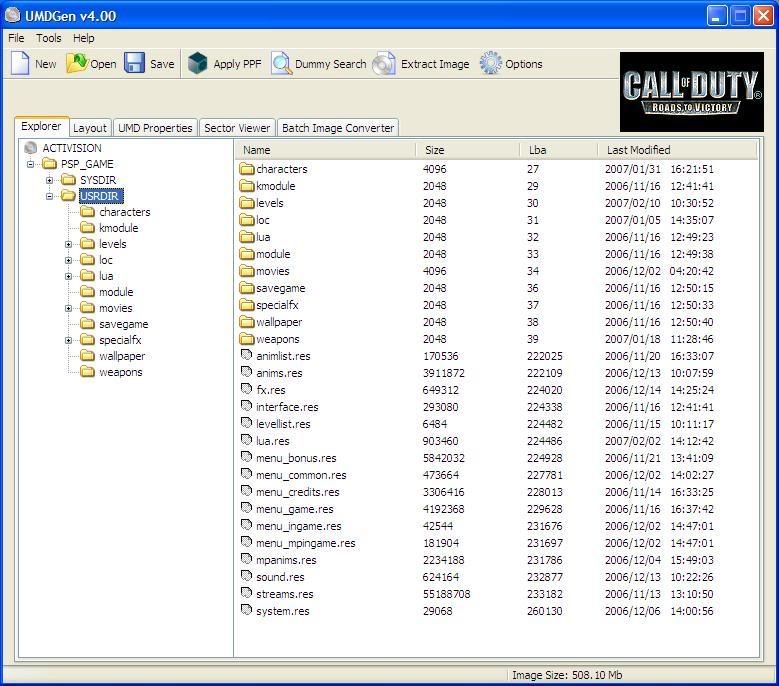
What are munge files? Firstly, MUNGE is actually an acronym, and it stands for Modify Until Not Guessed Easily. Similarly, a munge file is a file that has been modified until we are unable to tell the contents of it without using a dedicated application. In the context of ISOs, some games have all their data stored into one huge munge file, instead of separating them. Here's a screenshot of the difference between two games, one with a munge file and one without.
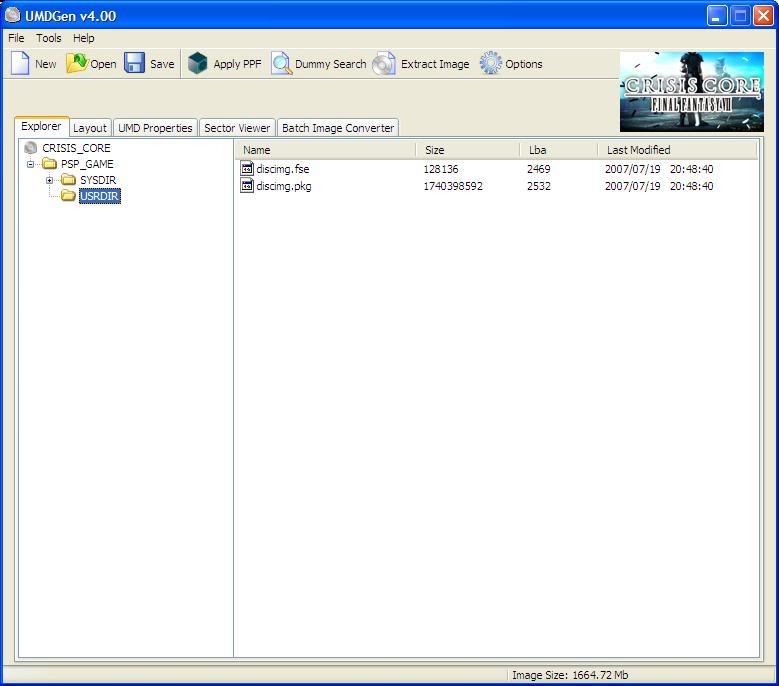

Crisis Core has a munge file


COD doesn't have a munge file

As you can see, Crisis Core contains a munge file that's nearly 1.7GB, while Call of Duty has its files individually stored into folders. This makes Call of Duty easily ripped, as you can simply go into the movie folder and relink all the movie files, instantly reducing the ISO size. On the other hand, you can't do the same with Crisis Core.

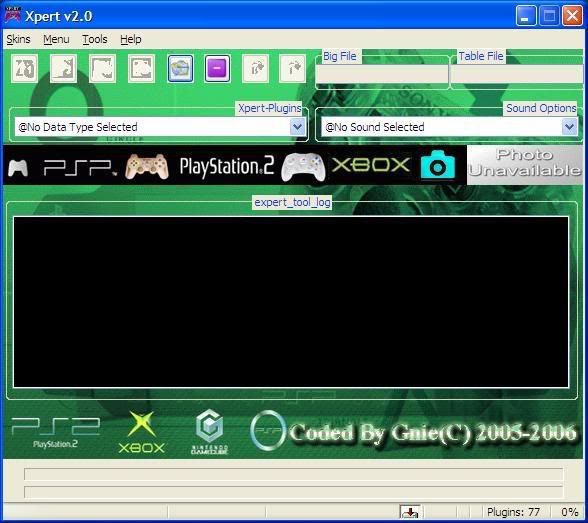
So, how do we go about ripping this munge file? We need the help of another program, Xpert 2, as well as the corresponding plugin for Crisis Core. Both will be available for download at the bottom of this post.

First, we will need to extract the munge files. Open up the ISO of Crisis Core, and extract both discimg.fse (LBA table) and discimg.pkg (munge file). This might take a while, as the files are nearly 1.7GB in size.

Once the extraction is done, close UMDGEN. We'll be moving on to Xpert 2. Run the setup program and install Xpert 2 first. Once it's done, we need to copy in the Crisis Core plugin. Go to where you installed Xpert 2, and copy the Crisis Core plugin to the Xpert-Plugins folder.
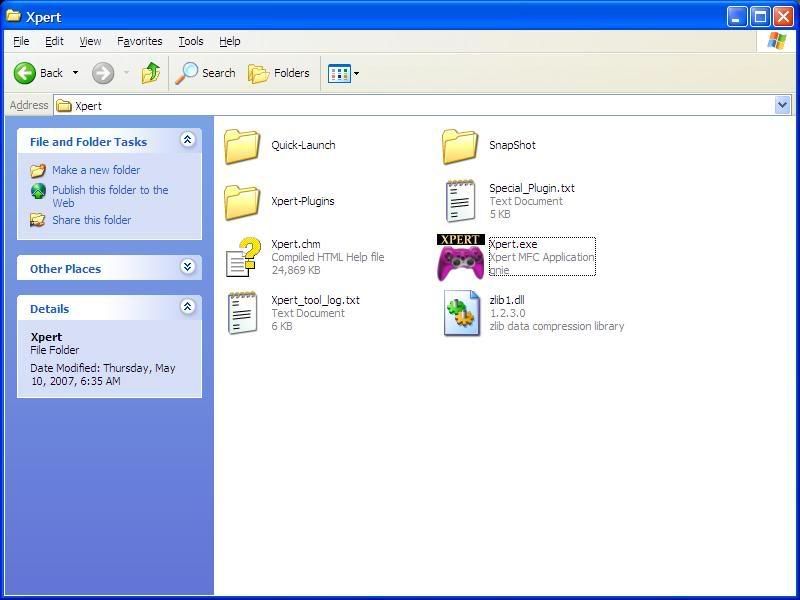

Place plugins inside Xpert-Plugins

Now run Xpert 2. It should take a while to load up the window, as well as the plugins.


First, select the Crisis Core plugin from the dropdown list labeled Xpert-Plugins. The Crisis Core picture should appear, indicating that you've selected the correct plugin. The window title should also change to reflect the plugin that's selected.
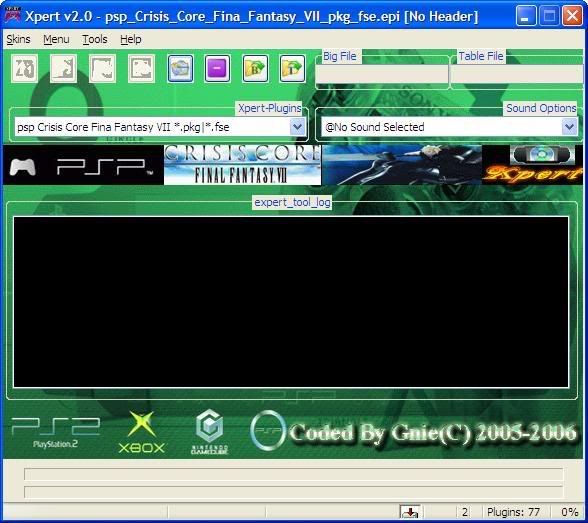

Notice the Crisis Core picture

Notice the row of buttons on top? Click the one with a yellow folder and the letter "B" on it. It's the button that's second from the right. Select the munge file, discimg.pkg.
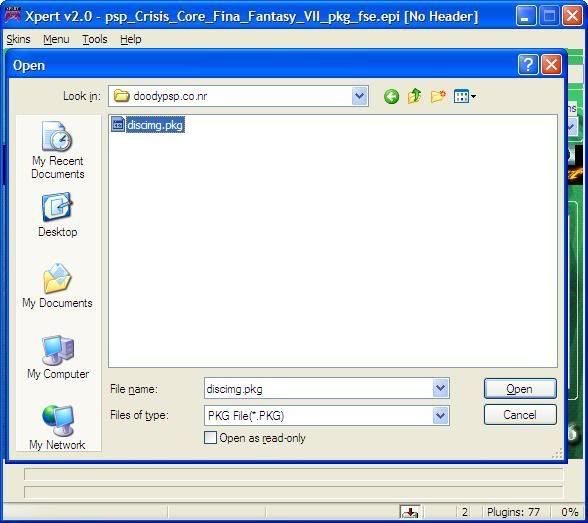

Selecting the munge file

Now click on the button with a yellow folder and the letter "T". This is the button all the way to the right. Select the table file, discimg.fse.
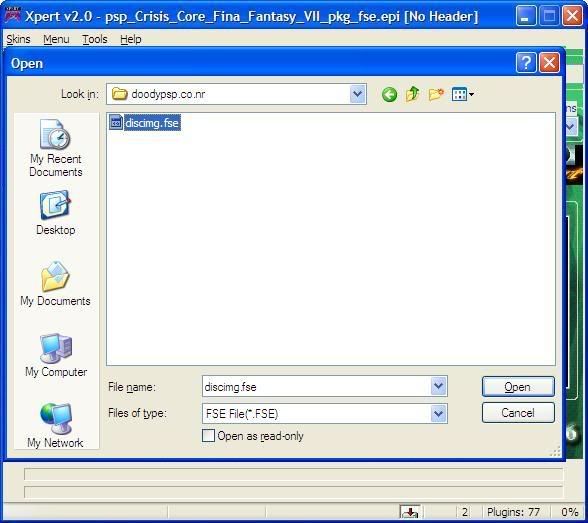

Selecting the table file

Now that you've selected both files, the other buttons are now enabled. Click button 1: Extract LBA. Once it's done, a message box will pop up, informing you that the extraction of LBA is done. Click OK to continue.
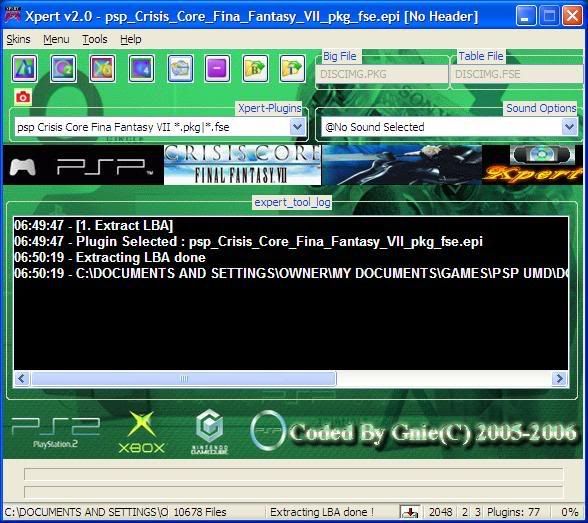

After Step 1

Now, click button 2: Extract File. This will take as long as 15 minutes, as the individual files are being extracted out from the munge file. As usual, a message box will inform you once it's done.
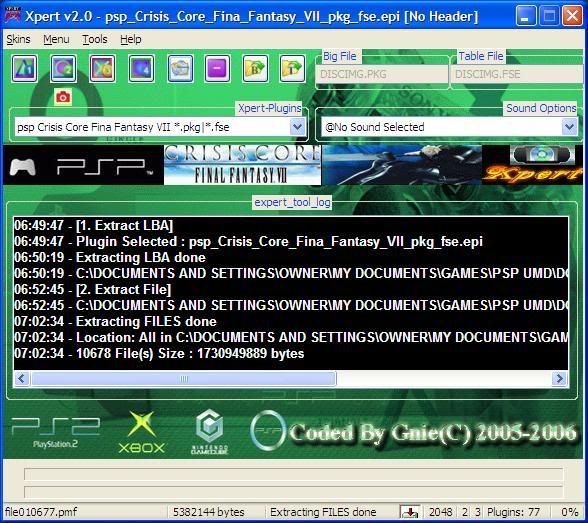

After Step 2

Go back to the folder where you saved the discimg.pkg and discimg.fse files. You should now see a new folder, @DISCIMG.PKG. This contains the files that were stored inside the discimg.pkg munge file.
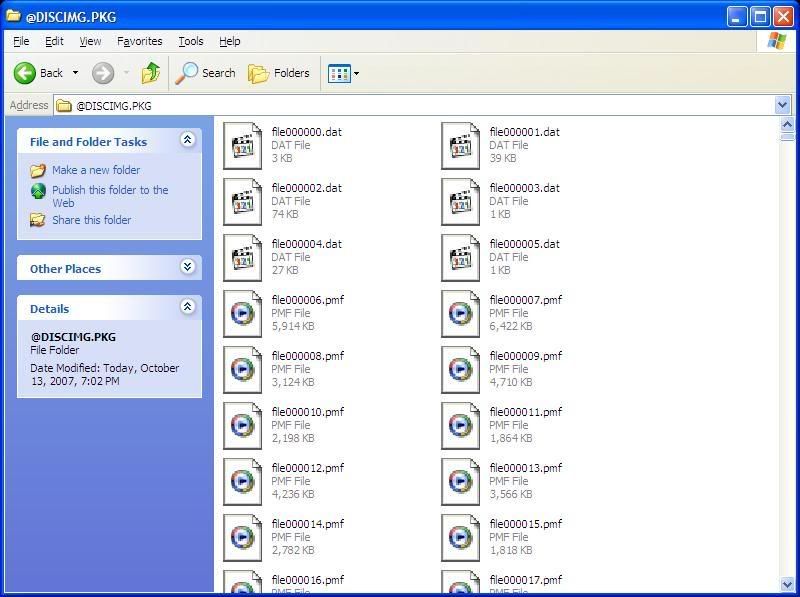

The contents of discimg.pkg

Here is where you can edit the files to cut down on the size. Some methods you can use are to replace the bigger files with smaller ones of the same type, or replacing the bigger files with empty files. This will involve quite a lot of manual work, so be prepared to spend a lot of time if you want to rip a complicated game.

Once you're done with the editing, it's back to Xpert 2 to rebuild the file. Click button 3: Rebuild File. Xpert will get to work combining all the individual files back into the munge file, and pop up a message box once it's done.
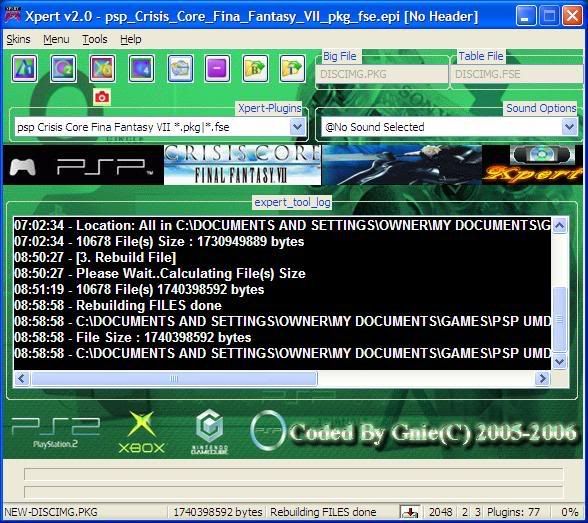

After Step 3

Lastly, click button 4: Rebuild LBA. This will fix up discimg.fse so that it will report the correct locations for the files.
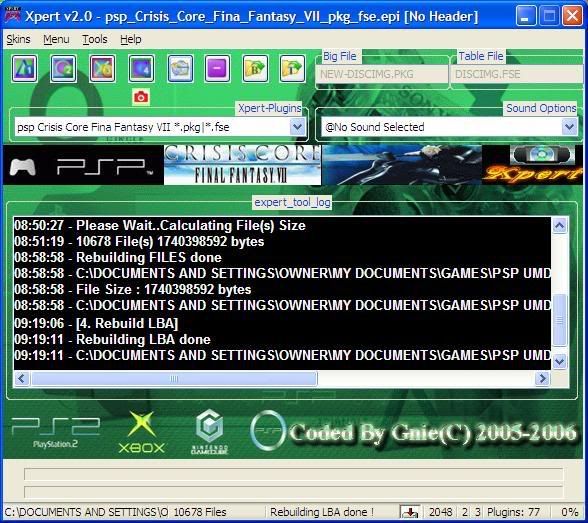

After Step 4

Go back to the folder and look for the newly built files. They should be called NEW-DISCIMG.FSE and NEW-DISCIMG.PKG. Change their names back to discimg.fse and discimg.pkg respectively, and put them into the Crisis Core ISO file using UMDGEN. Save it and you're done.

This method can be used for any other munge files that you come across, as long as you have the correct plugin for the file that you're trying to edit. Have fun ripping games that you originally thought could never fit on your 1GB memory stick!

Note: The Xpert 2 RAR that you download here will have two files inside, Xpert.msi and Xpert.exe. First run Xpert.msi to install the program, then replace the original Xpert.exe with the one provided inside the RAR. This is a bugfix for the application, if you don't use it you might face some problems while using Xpert.

22/03/08: Now that the English version of Crisis Core has been released, seems like there's renewed interest about ripping it. I've reuploaded Xpert as well as the plugin here.
Get the Xpert 2 tool: Download
Xpert2 Fix: Download
And the Crisis Core Xpert Plugin: Download
Sunday, October 7, 2007

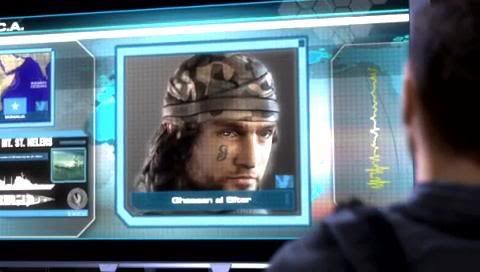
Out Now: Syphon Filter: Logan's Shadow


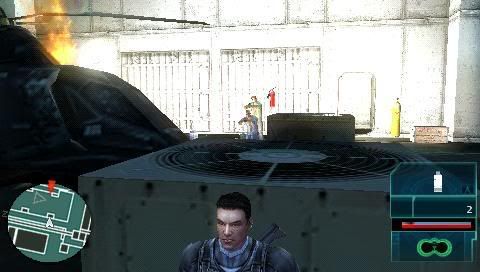
Syphon Filter: Logan's Shadow is out in stores now, and I've just managed to find some time out of updating my blog to test out this game.

Logan's Shadow is the second game released in the Syphon Filter series for the PlayStation Portable, the first being Dark Mirror. As such, you'll find Logan's Shadow very familiar. The control scheme hasn't changed one bit, which is good, considering that this control scheme is excellent for use on the PSP.

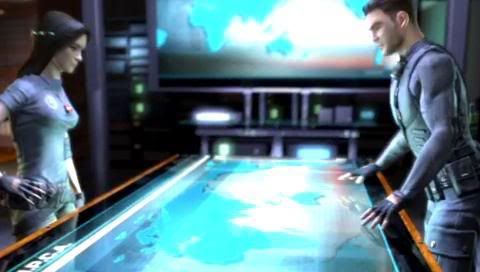
Apart from that, the main characters have made a comeback, with the player still controlling Gabe Logan in a third-person perspective, and Teresa providing the intel backup from HQ. I've only managed to play Parts 1 and 2 of the first episode, but so far no new weapons have been introduced yet.

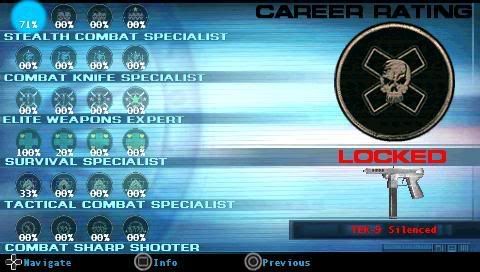
Mission Mode and Career Rating is still in this game, allowing you to replay individual missions to unlock new weapons for multiplayer action.


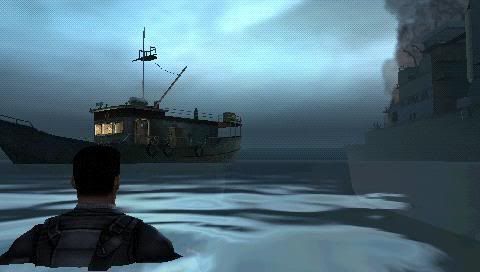
Thankfully, Logan's Shadow introduced the ability to interact with water, opening up a new dimension of gameplay. Gabe is now able to swim and dive in water, which you can try at the start of Part 2 of Episode 1.


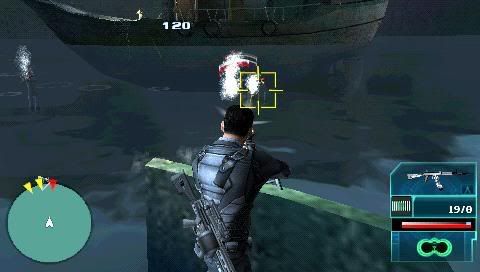
Weapons still work in the water, but fire rate slows down and bullets take a longer time to reach their target, meaning you'll have to lead your targets if they're moving. The enemy AI can also enter the water, which is pretty cool as well. Shooting into water also produces a water spray effect, making the water seem more realistic.


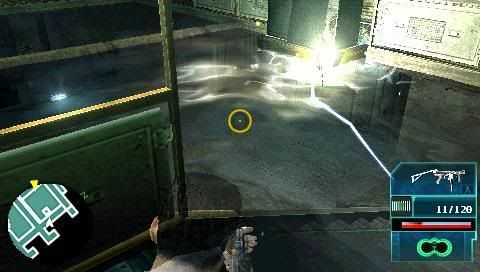
Just don't step into the water when it's electrified!


I also had a chance to try throwing a flashbang during the game. It works quite well, stunning the enemies for a good 5 seconds and allowing you to get in a few shots at them unhindered. The visuals are also well done, lighting up the surrounding area in white when the flashbang explodes.


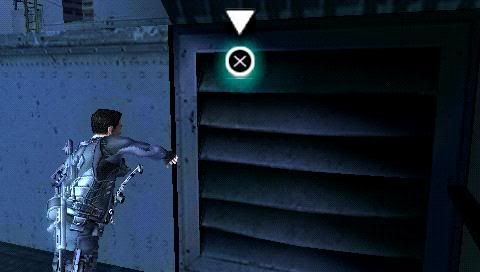
Logan's Shadow adds a button-pressing minigame in certain parts of the mission as well. In one game, you have to press the appropriate face button (Square, Triangle, Circle or Cross) when it appears on screen. Another kind is shown below, where you have to repeatedly press the same button until it appears green.


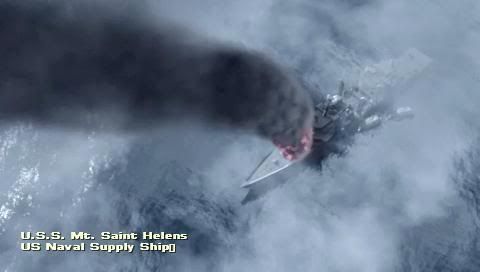
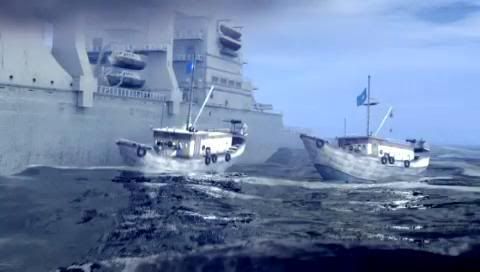
Cutscenes before the start of each episode, done up in full CG, introduce you to the background story of the area. They were so well done, for once I decided to watch them, instead of just simply ripping them out of the game, which would have saved me nearly 500MB of space.


Whether you're a fan of Dark Mirror or playing Syphon Filter for the first time, I recommend you try this game out. It's one of the better FPS games available on the PSP, with good graphics and most importantly a good control scheme.

Making ISOs Smaller: Part Two

Welcome to the second part of my series on Making ISOs Smaller. As promised, this post will be covering the method of ripping your ISOs to squeeze them onto your memory stick.

Firstly, we'll need a copy of UMDGEN to be able to do this. UMDGEN is designed for use with PSP ISO images, and it comes with important functions like dummying, relinking, and saving straight to compressed format.


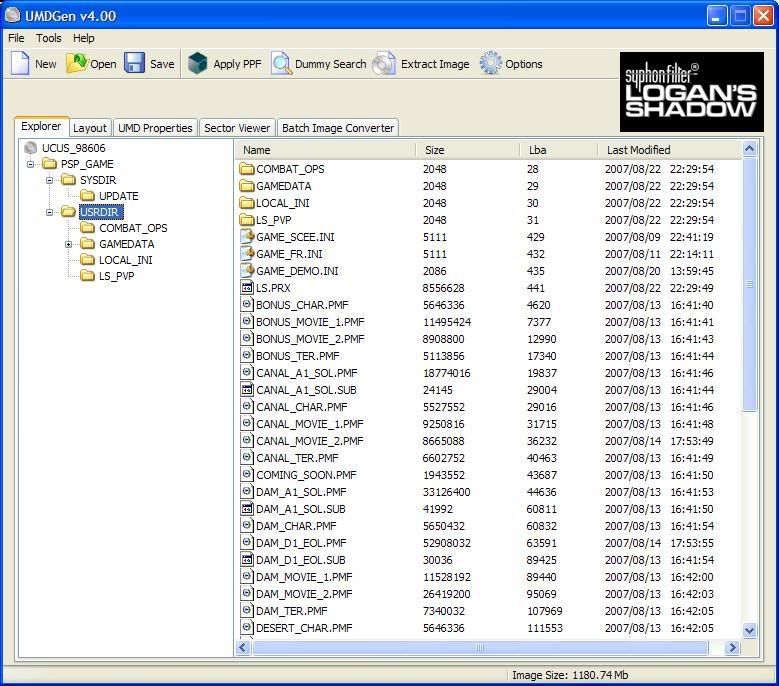
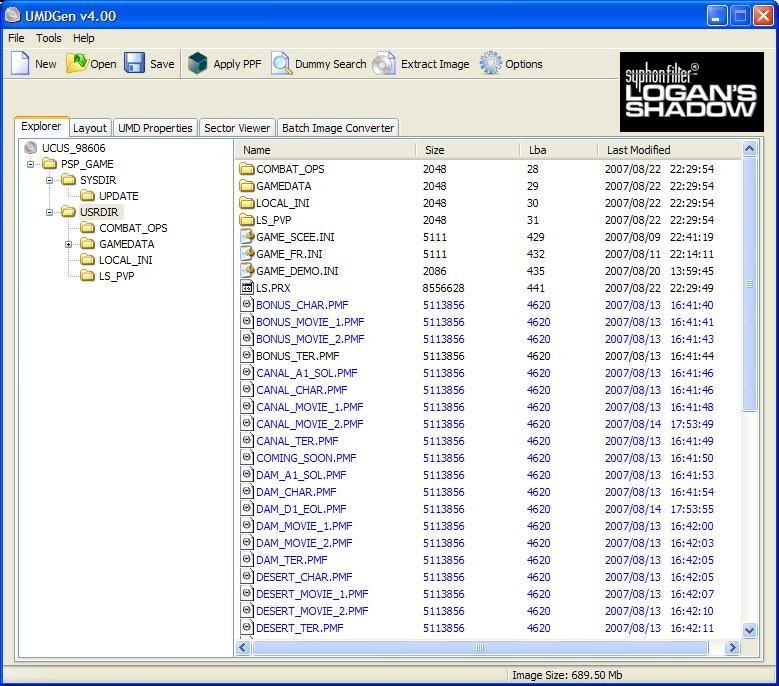
I'll be using Syphon Filter: Logan's Shadow as an example here. Logan's Shadow comes with quite a number of files that can be dummied or relinked to reduce the ISO size. Firstly, rip your UMD to get the ISO image. Some programs that you can use are PSP Filer and USBSSS.

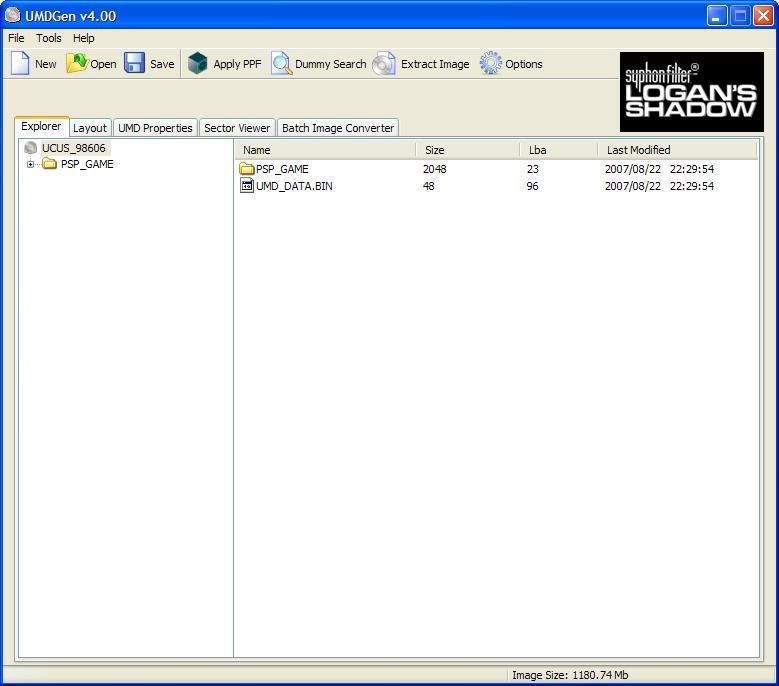
Next, let's open up the ISO image in UMDGEN. Drag and drop the ISO file into UMDGEN and it should load automatically.


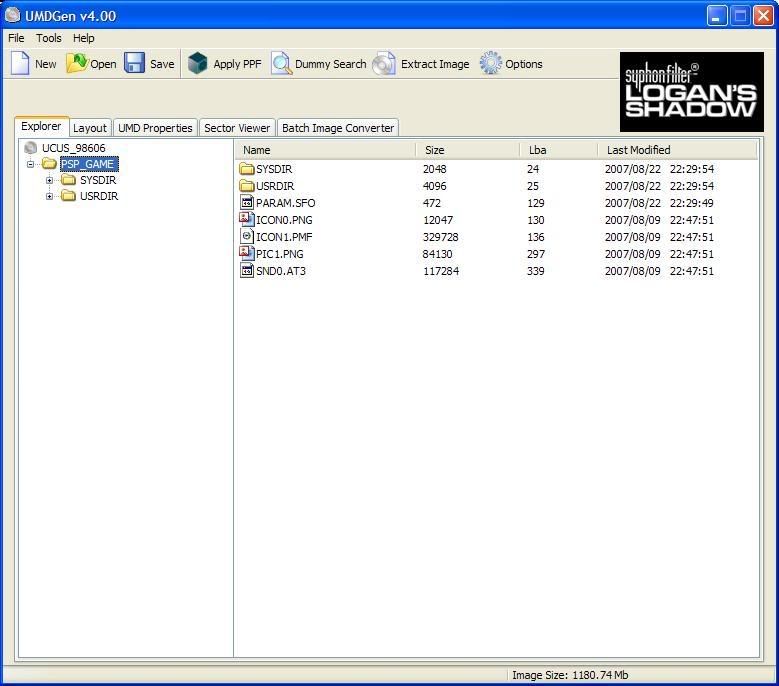
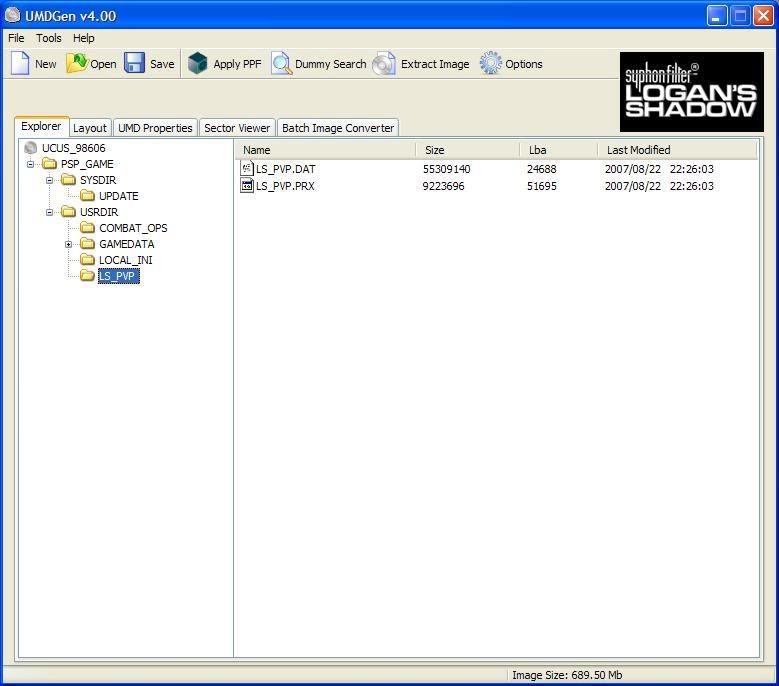
You should be able to see the icon of the game in the top right, as well as the size of the ISO at the bottom right corner. The folder structure will be displayed on the left side, while the files are displayed on the right side.

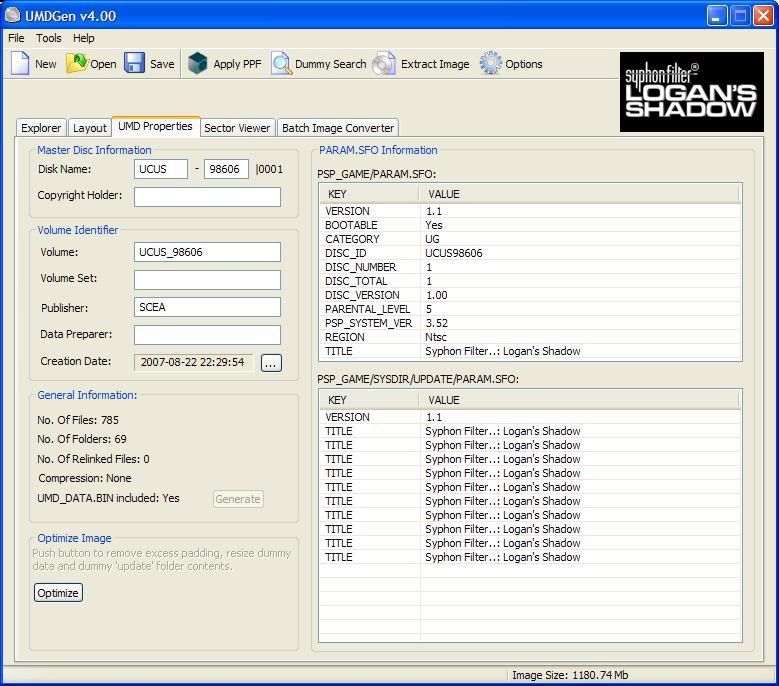
The first thing you can rip out of the game is the firmware update. You can remove it without any problems whatsoever. UMDGEN has made an easy Optimize button to do it for you, as well as remove excess padding between files and resizing dummy data. The Optimize button is found under the UMD Properties, at the bottom left.


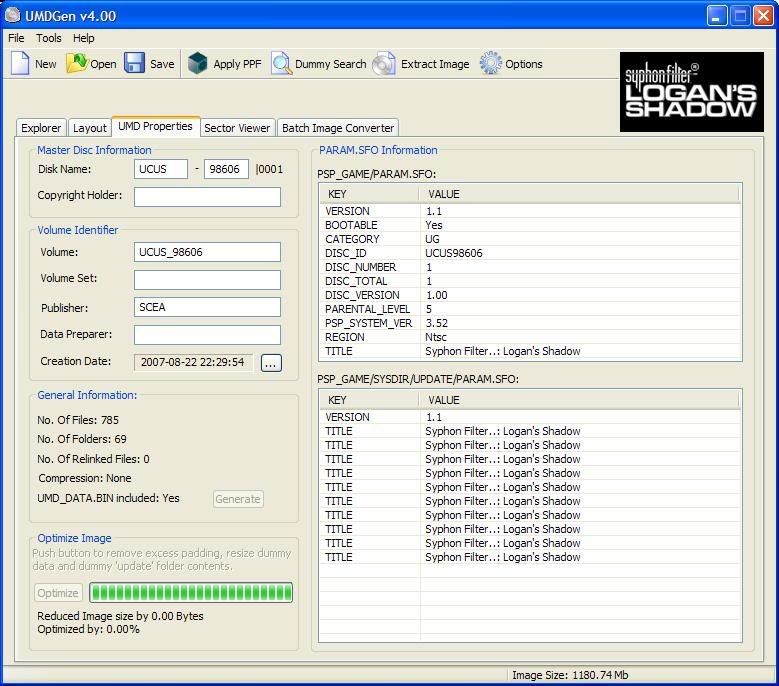
Over here, you can also view other information like the Game ID, minimum firmware required to launch the game, and the version of the firmware update that comes with the game.

Click Optimize, and UMDGEN will get to work, giving you a final report on how much data was removed. I've already done it beforehand, so mine appears as 0.00 bytes, but usually you should see a reduction of about 40MB in size.


Once done, we'll now go back to the main part: ripping out individual files in the image. Go back to the Explorer tab. I'll do a runthrough of the entire folder structure.


First up, we have PSP_GAME. This contains the SYSDIR and USRDIR folders, as well as some PNG, PMF and AT3 files. These files are used to display the game icon, background image, and background music when you select the game on your PSP.


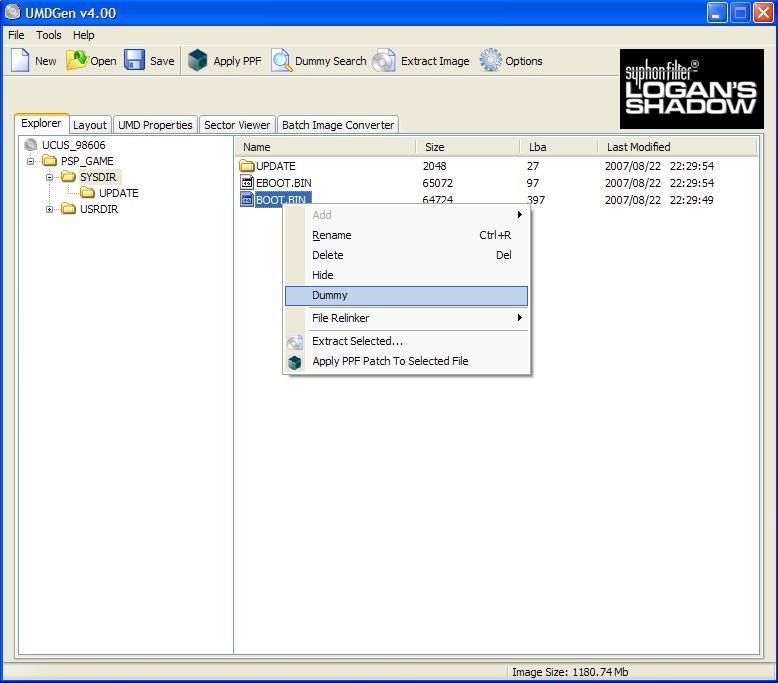
Here we have the SYSDIR folder. The contents of this folder is always the same for all PSP games. We have an UPDATE folder, which is where the firmware update is stored, and 2 files, EBOOT.BIN and BOOT.BIN, which are used to load the game. EBOOT.BIN is always needed, but you can actually safely dummy BOOT.BIN to save a little space.

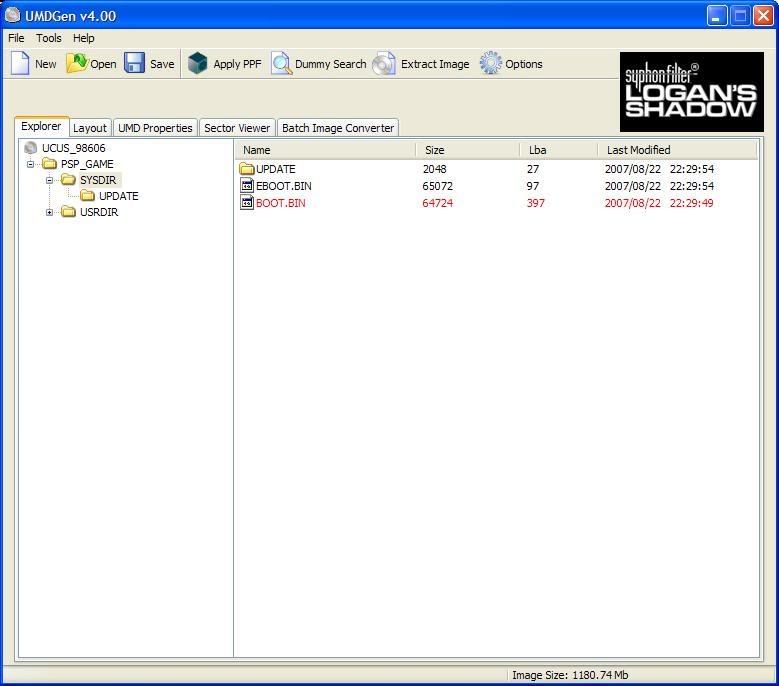
To dummy a file, simply right-click on it, and select Dummy. The file name, size, LBA and last modified will now be displayed in red to indicate that it's being dummied.


Notice that there's no change in the image size. That's because the file is not being deleted, rather it is being replaced with empty data. This empty data will be easily reduced when you save this image with CSO compression.

Now we go into the main folder USRDIR, where all the game files are stored.


You should be able to see many PMF files that are pretty big, with sizes ranging from around 5MB to 50MB. These are video files, and are most probably in-game cutscenes. If you don't watch them, you can remove them and save quite a lot of space here.

For PMF files, I recommend that you do relinking instead. The reason is because most games have problems when asked to load a dummy PMF containing 0 data. Instead of dummying it straight, we can relink the larger PMF files to a smaller PMF file, allowing us to save space and also allow the game to run as per normal.

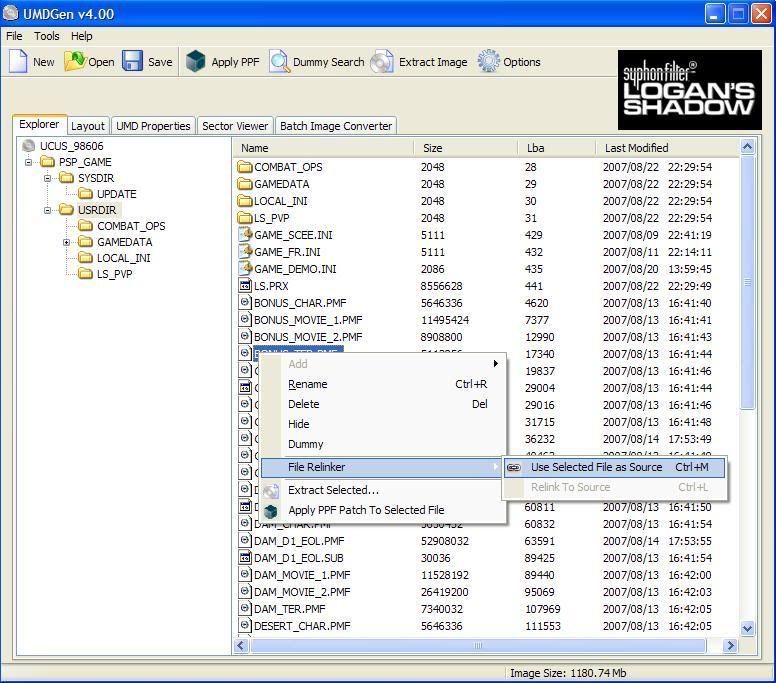
I've chosen BONUS_TER.PMF as my source file for the relinking. It's the smallest at around 5MB only, so it should cut down quite a bit of the file size once I'm done. If you really want to save even more space, you can actually relink all the PMF files to the ICON1.PMF in the PSP_GAME folder. That file is only 300KB in size, so that's potentially an additional 4.7MB saved per PMF file relinked.

To relink, first right-click on the source file (BONUS_TER.PMF) and select "Use Selected File as Source". You can also press the shortcut key CTRL-M.


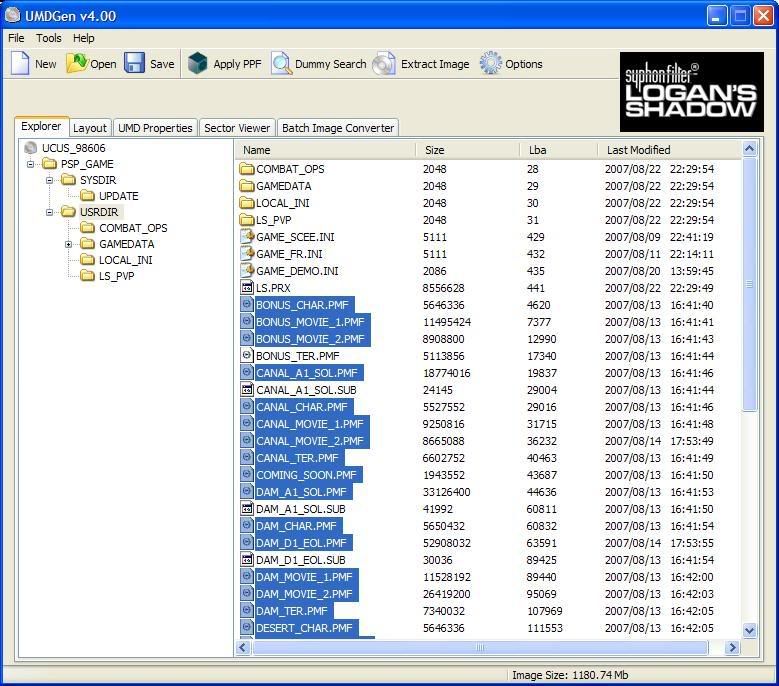
Now, select all the PMF files you want to relink to BONUS_TER.PMF. To select multiple files, hold down CTRL, and click on each individual file that you want to select. You can also select files that are together by clicking and dragging to higlight one chunk of files at once.


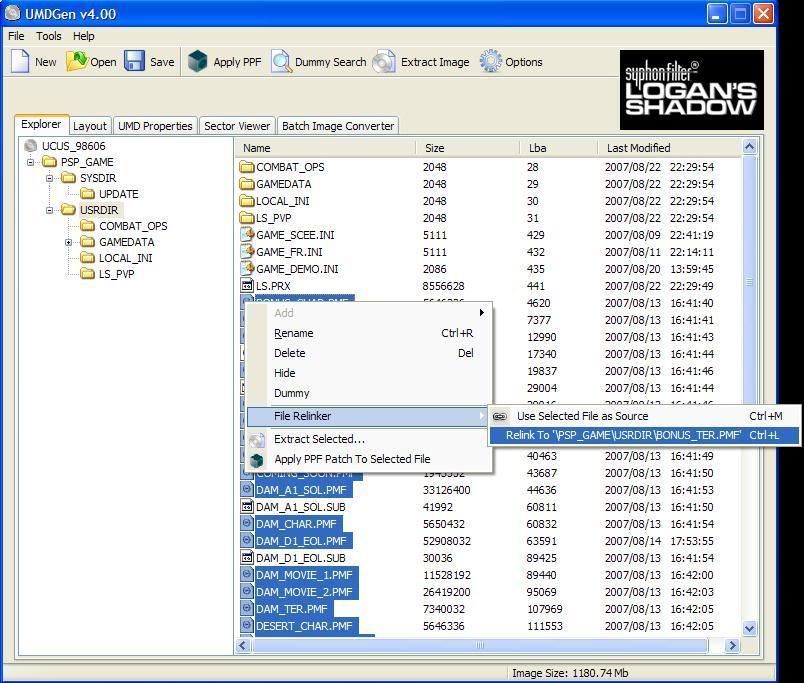
Right click on any of the highlighted files, and select "Relink to \PSP_GAME\USRDIR\BONUS_TER.PMF".


Once it's done, you should notice that the relinked files have turned blue and their arrangement has shifted. The LBA of all the PMF files now reflect that of BONUS_TER.PMF, meaning that when the PSP looks for any of those video files in blue, it will go straight to the location of BONUS_TER.PMF, and play that instead. Relinking will also change the image size, which has now dropped by around 500MB to 689.50MB.


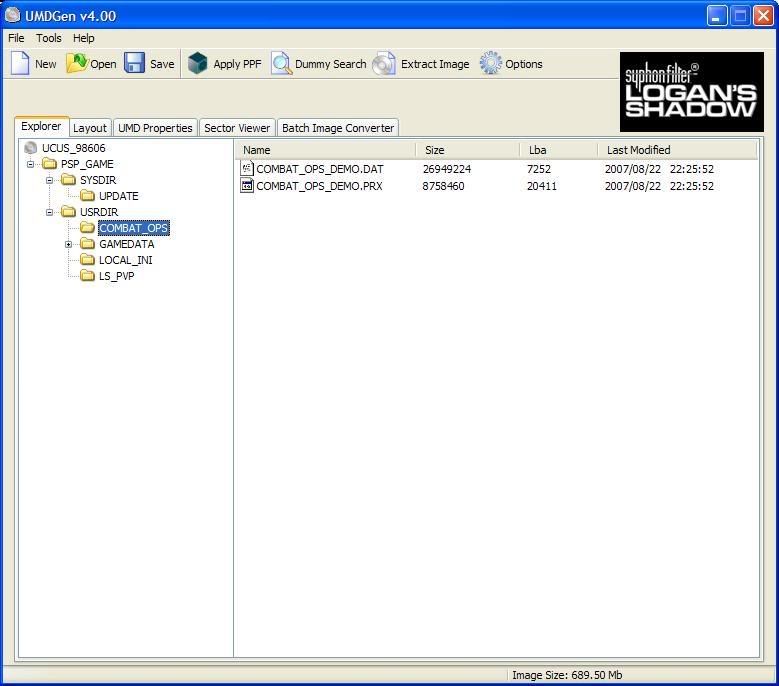
There are two more things that I know can be ripped: The demo of Syphon Filter: Combat Ops, and the Multiplayer function. The demo is found in the COMBAT_OPS folder, while the multiplayer is found in LS_PVP.


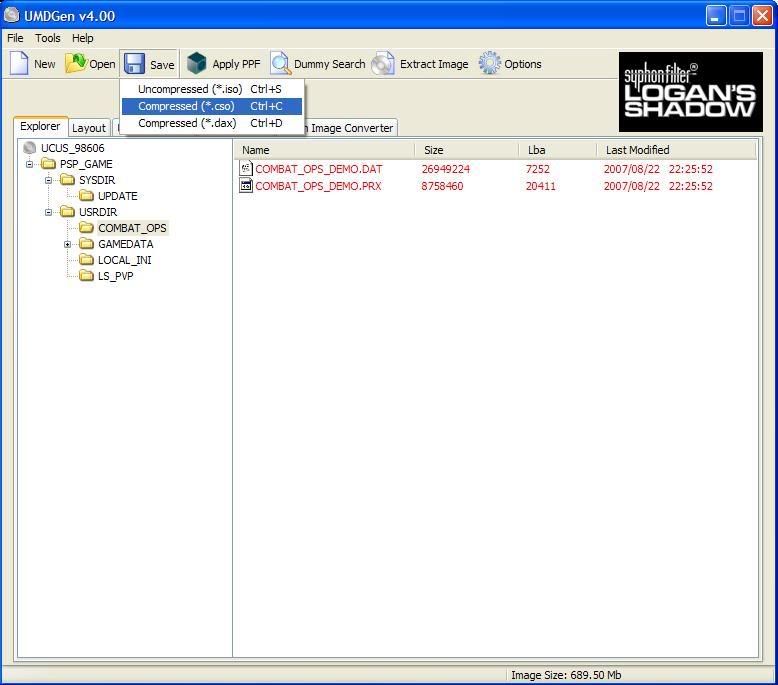
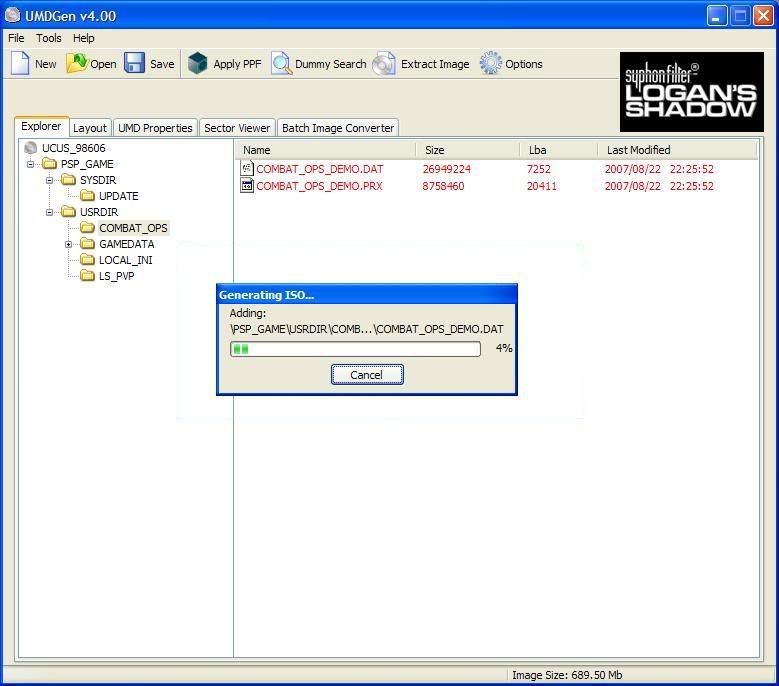
You can just dummy these two folders, but the respective features won't work anymore in the game. Together they take up approximately 98MB of space. I've dummied them in this example.

Anyway, once you're done, you're ready to save the ISO image. Click on the Save button in the toolbar, and select "Compressed (*.cso)" to save and compress the file directly.


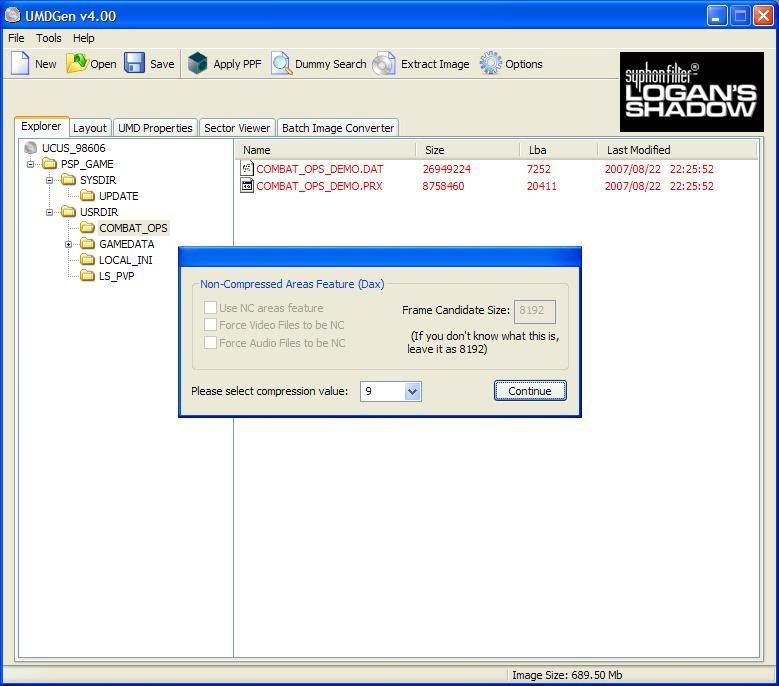
Select the compression level (9 is for maximum compression), and click Continue.


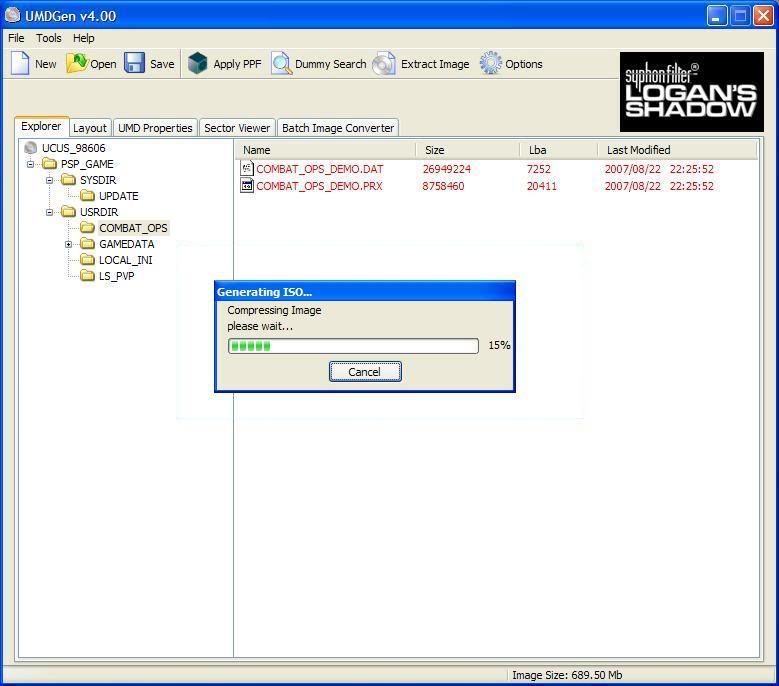
UMDGEN will start to build the ISO first, and when it's done it'll automatically compress it to CSO format.


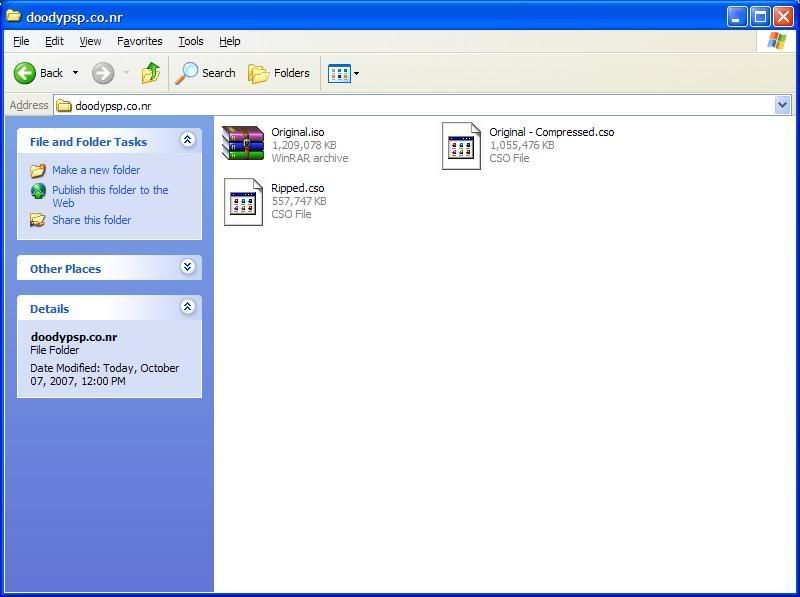
That's it! Let's check how much space we've saved by ripping files from the game.


By simply compressing the ISO to CSO, we got a file size of 1GB, or a reduction of 13%. But by ripping out various files, we've ended up with a compact file size of 544MB, or a reduction of 52%! So if you're the kind that ends up skipping all the cutscenes in games, why not rip them out and save that extra space for more games?

Start ripping with UMDGEN: Download

Friday, October 5, 2007

Silent Hill: Origins (Demo) Review


I've just tried out the demo of Silent Hill: Origins, and I'm quite pleased with this PSP version. Set before the original Silent Hill game, Origins will explain to the player how Silent Hill became the creepy place it is now. You control Travis Grady, a trucker who saved a girl from a burning house when he made a pit stop at Silent Hill. The demo throws you straight into the hospital, where Travis goes to find out what happened to the girl he saved last night.
Along the way, he meets a rather shady doctor, who suspiciously deflect his questions and hurries off without giving Travis an answer. Travis follows the doctor to the second floor, where he finds a portal to the alternate world via the mirror in the operating room.


The portal to the alternate world

With frequent traveling between the two worlds required, the developers have made sure to include different visual effects for both worlds, so as to be able to tell them apart. Here are two shots of the same room in the two worlds.


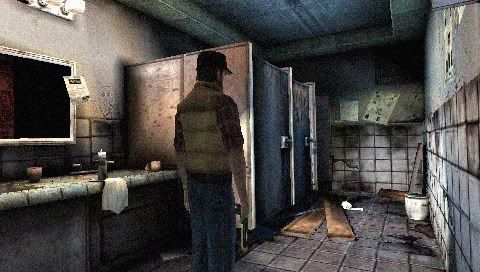
In the normal world


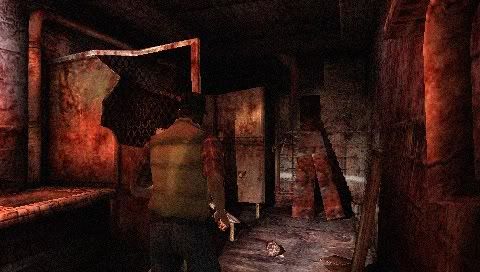
In the alternate world

As you can see, the normal world looks normal, of course. The alternate world, however, is mostly covered in a blood-red visual effect, adding to the eeriness of this game. In fact, a tip at the start of the game advises you to play this game using headphones and with the lights off. With the superb background music and spooky visuals, it's got to be one gaming experience you'll never forget.

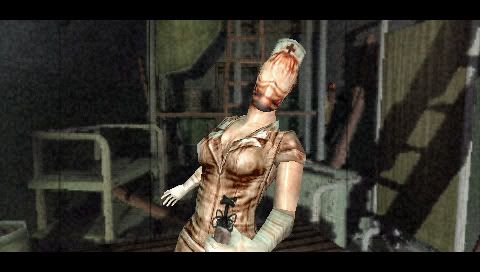
If you thought monsters were only found in the alternate world, think again. Your very first monster encounter in the game happens right in the normal world.


That's one freaky nurse

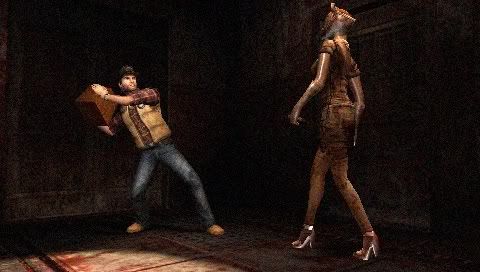
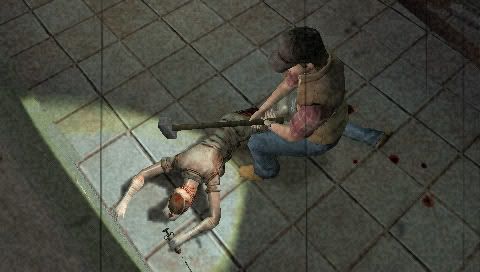
Combat in Silent Hill: Origins is a very simplified process. Equip your weapon in the menu, hold R-trigger to make Travis enter combat stance, and press Cross to swing your weapon/fists. There is an automatic target lock-on so you don't need to mess around with complicated targeting controls. In this demo there's only a limited choice of weapons, such as the sledgehammer and scapel. Weapons also break after a limited number of uses, so you might have to count on your trusty fists most of the time.


Yes, a TV is a weapon too

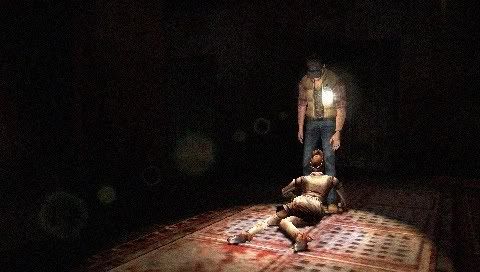
Once the enemy is down, it'll continue writhing on the floor until you go up to it and finish it off. Do remember to do this for all enemies, else they'll get up after a while and come back to hunt you down.


Finish off the monsters...


...else they'll come back to haunt you

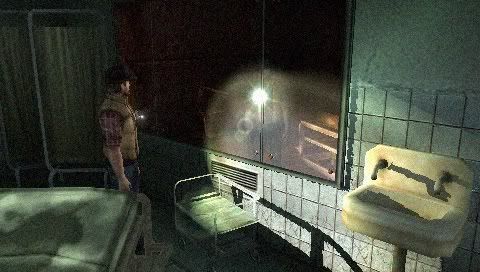
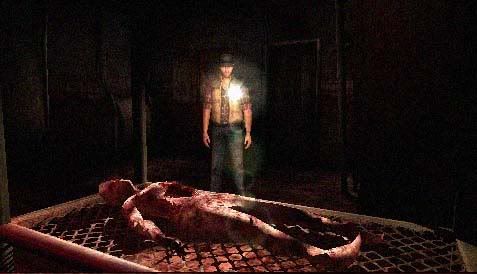
The audio in this game is done up quite nicely, with appropriate music to build up the atmosphere of spookiness as you move around in-game. For example, the buildup of the drum and bass as you approach the elevator at the start of the game. Visuals in this game really bring out the full experience of Silent Hill, with your flashlight lighting up the dim corridors and casting realistic shadows on every object. Frame rate remained constant throughout the demo, with no noticeable slowdowns.


Notice the excellent lighting effects

In this short demo of about 30 minutes, Origins has given us a pretty good glimpse of what to expect in the full version, due to be released in about a week's time. With monsters showing up at unexpected corners, baffling puzzles to be solved, and an air of mystery around the place, Silent Hill is all set to give players an experience they'll never forget.


Twitter and Facebook SMS Updates